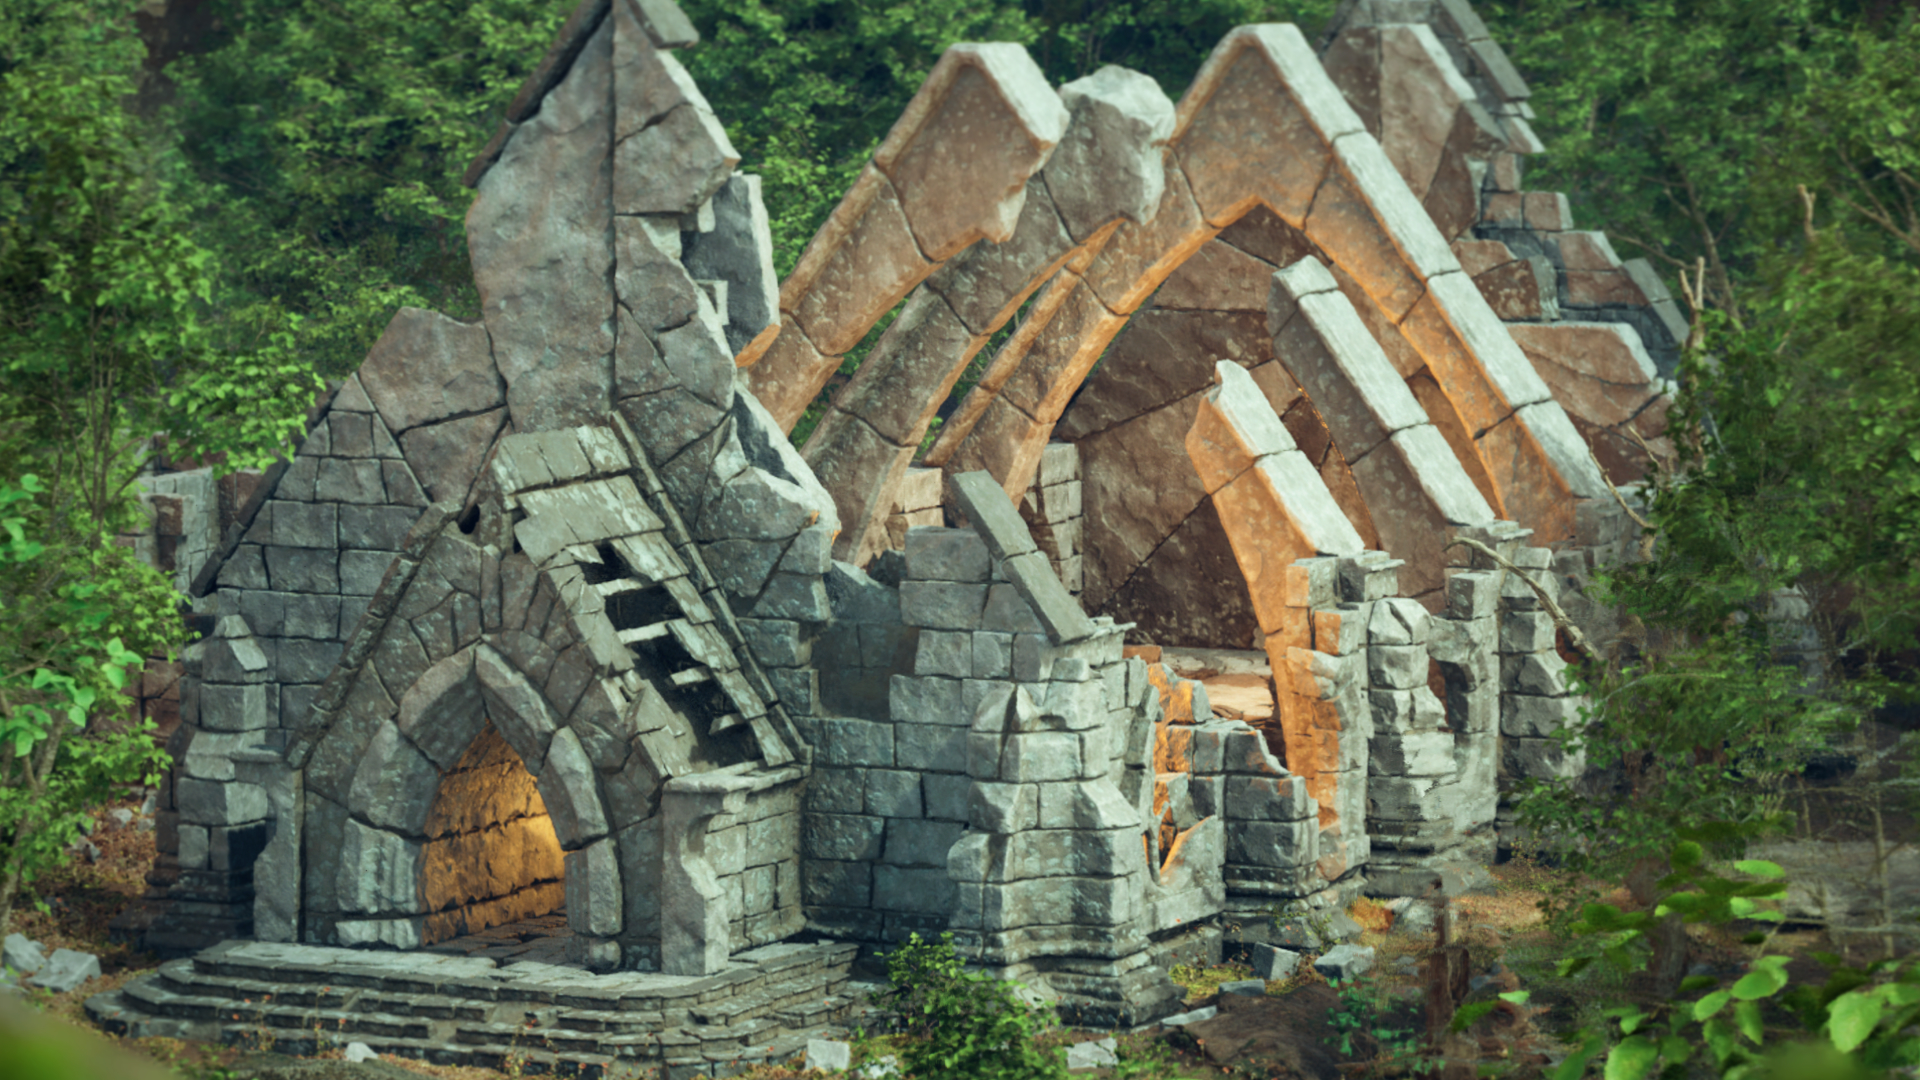
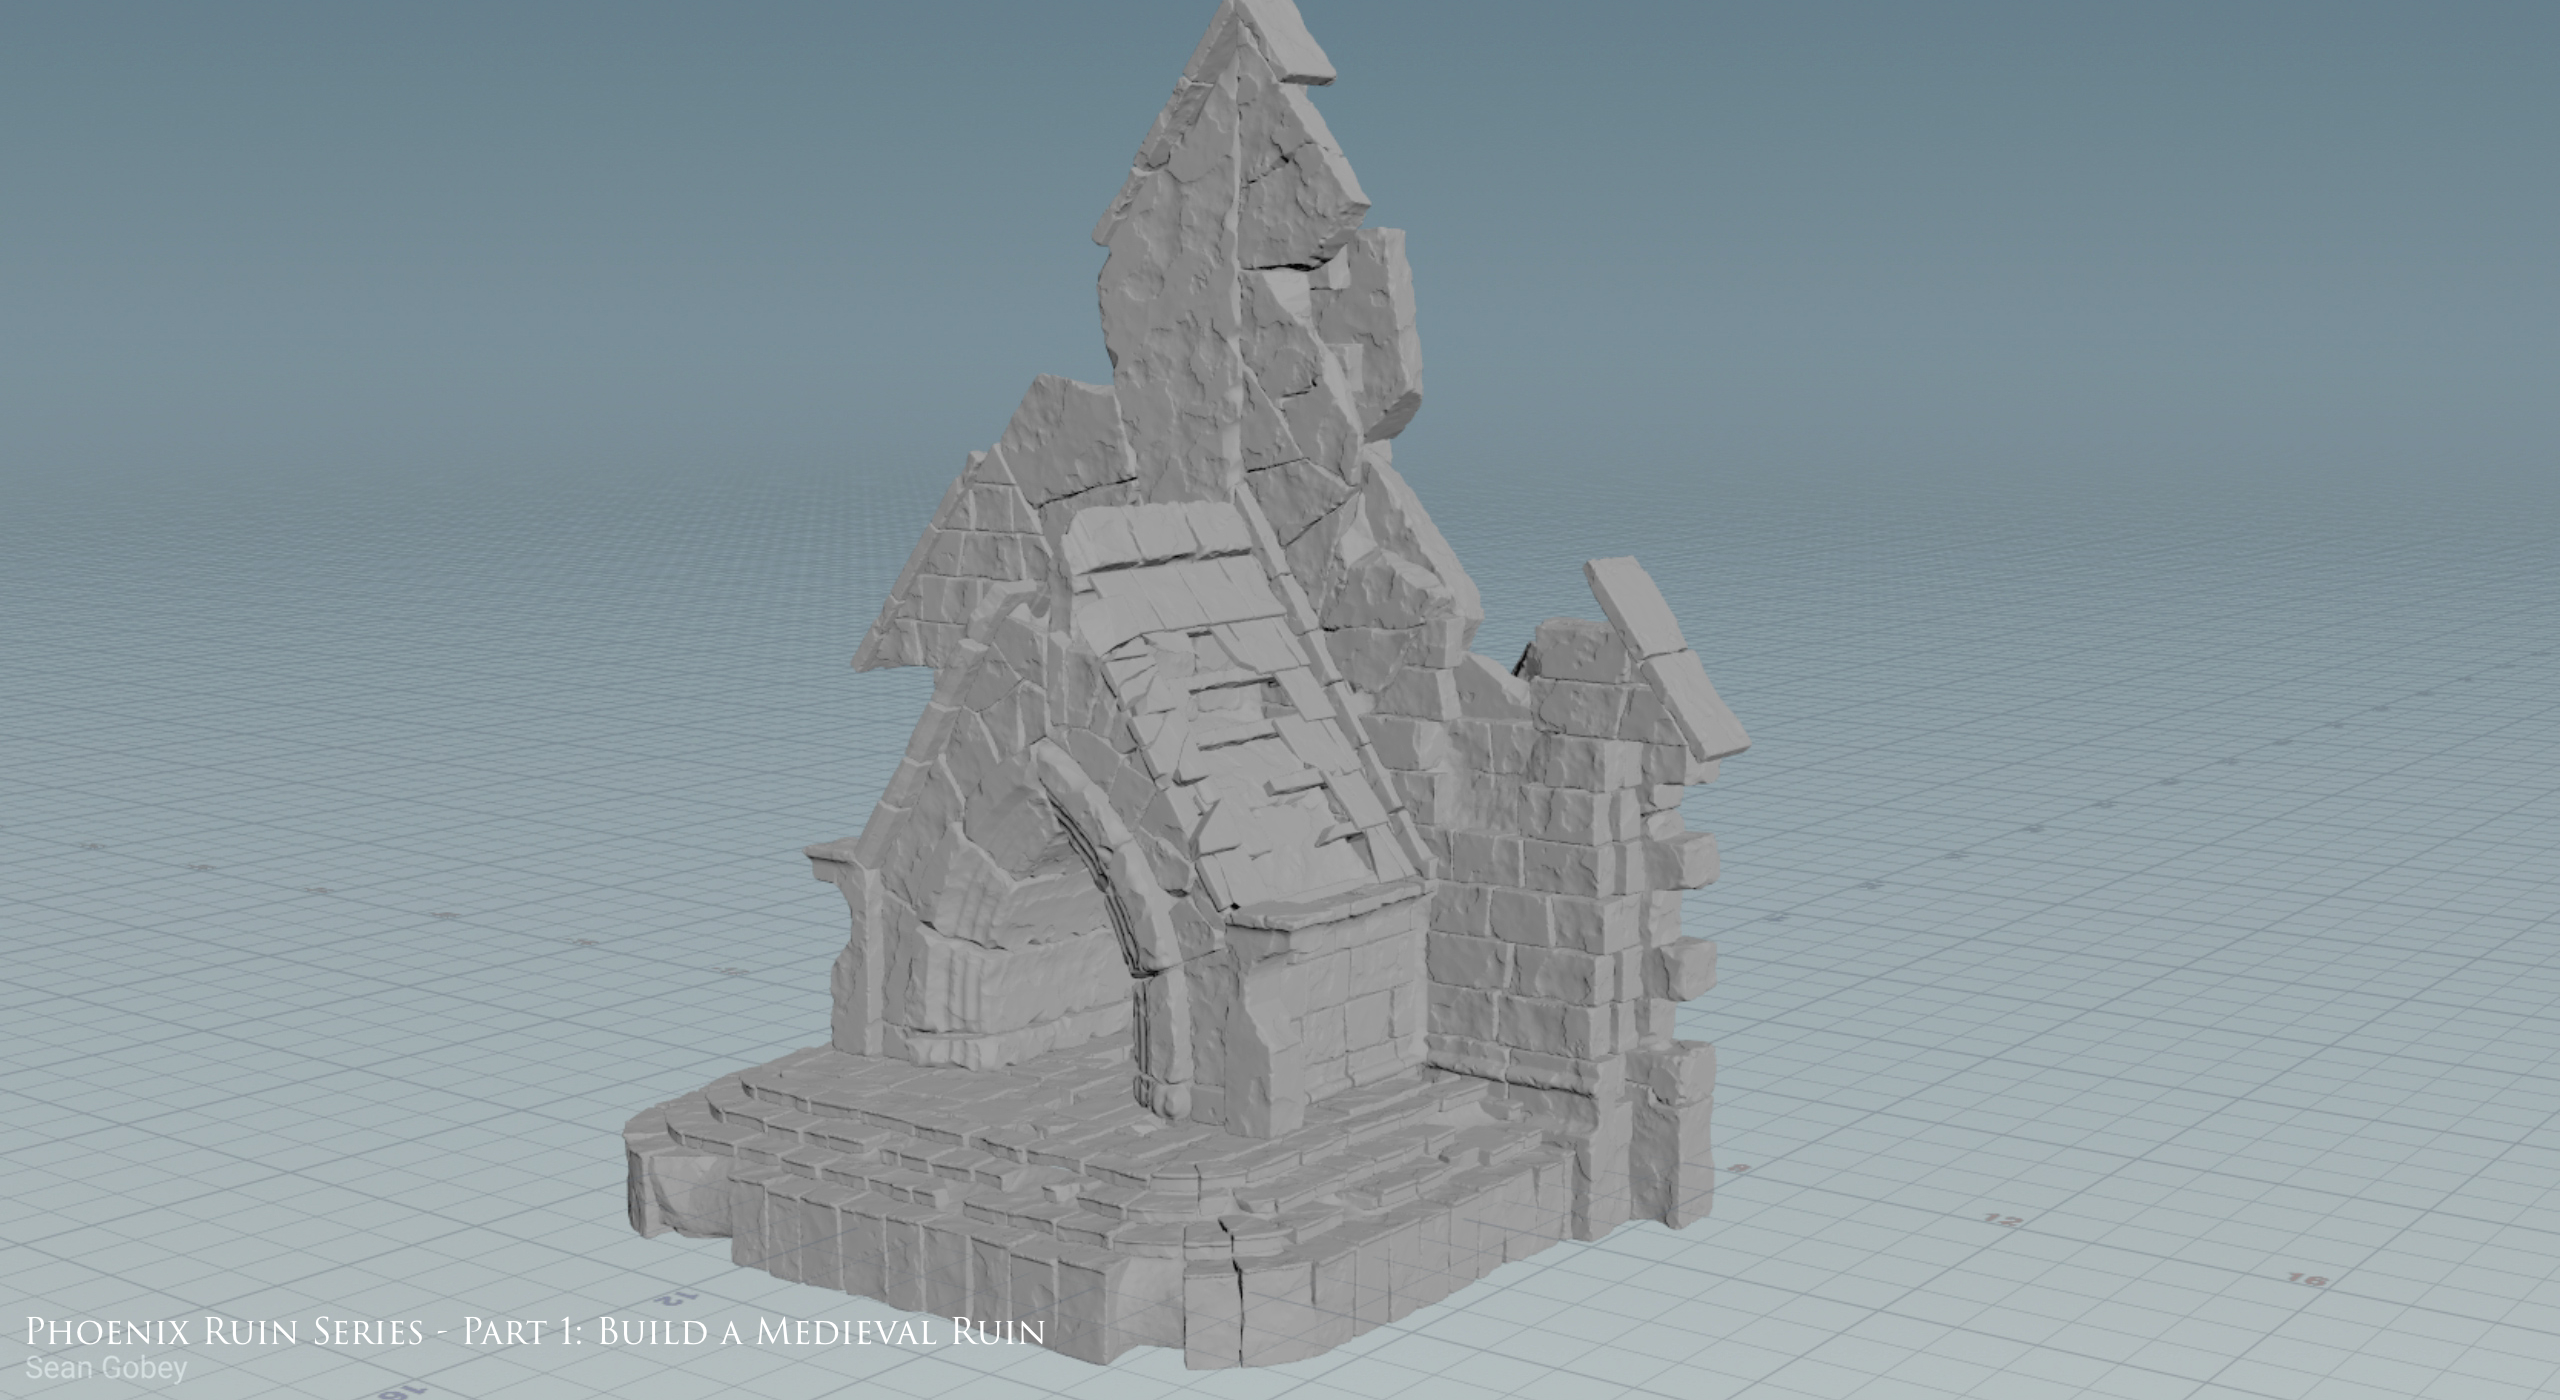
If you’re a 3D artist who’s driven to grow and master high-poly asset creation, this series is for you! In part 1 of the series using Houdini and Unreal Engine 5 we build a medieval church ruin asset kit from scratch consisting of over 200 million polygons.
This course consists of 8 chapters with over 90 hours of content. Each recording is in real-time giving you the option to follow along step by step if you choose.
Click on the image to the right to watch an overview video.
Note: All videos have been edited to remove as much “chaff” as possible. This includes saving, processing, and import times to name a few.

In chapter 1 we build our developer grid texture and materials in Maya and Unreal Engine 5. We briefly discuss vertex colours and their use in asset creation.
Note: if you’re not comfortable with or don’t have access to Maya feel
free to use your own modelling package as most techniques used are
universal.
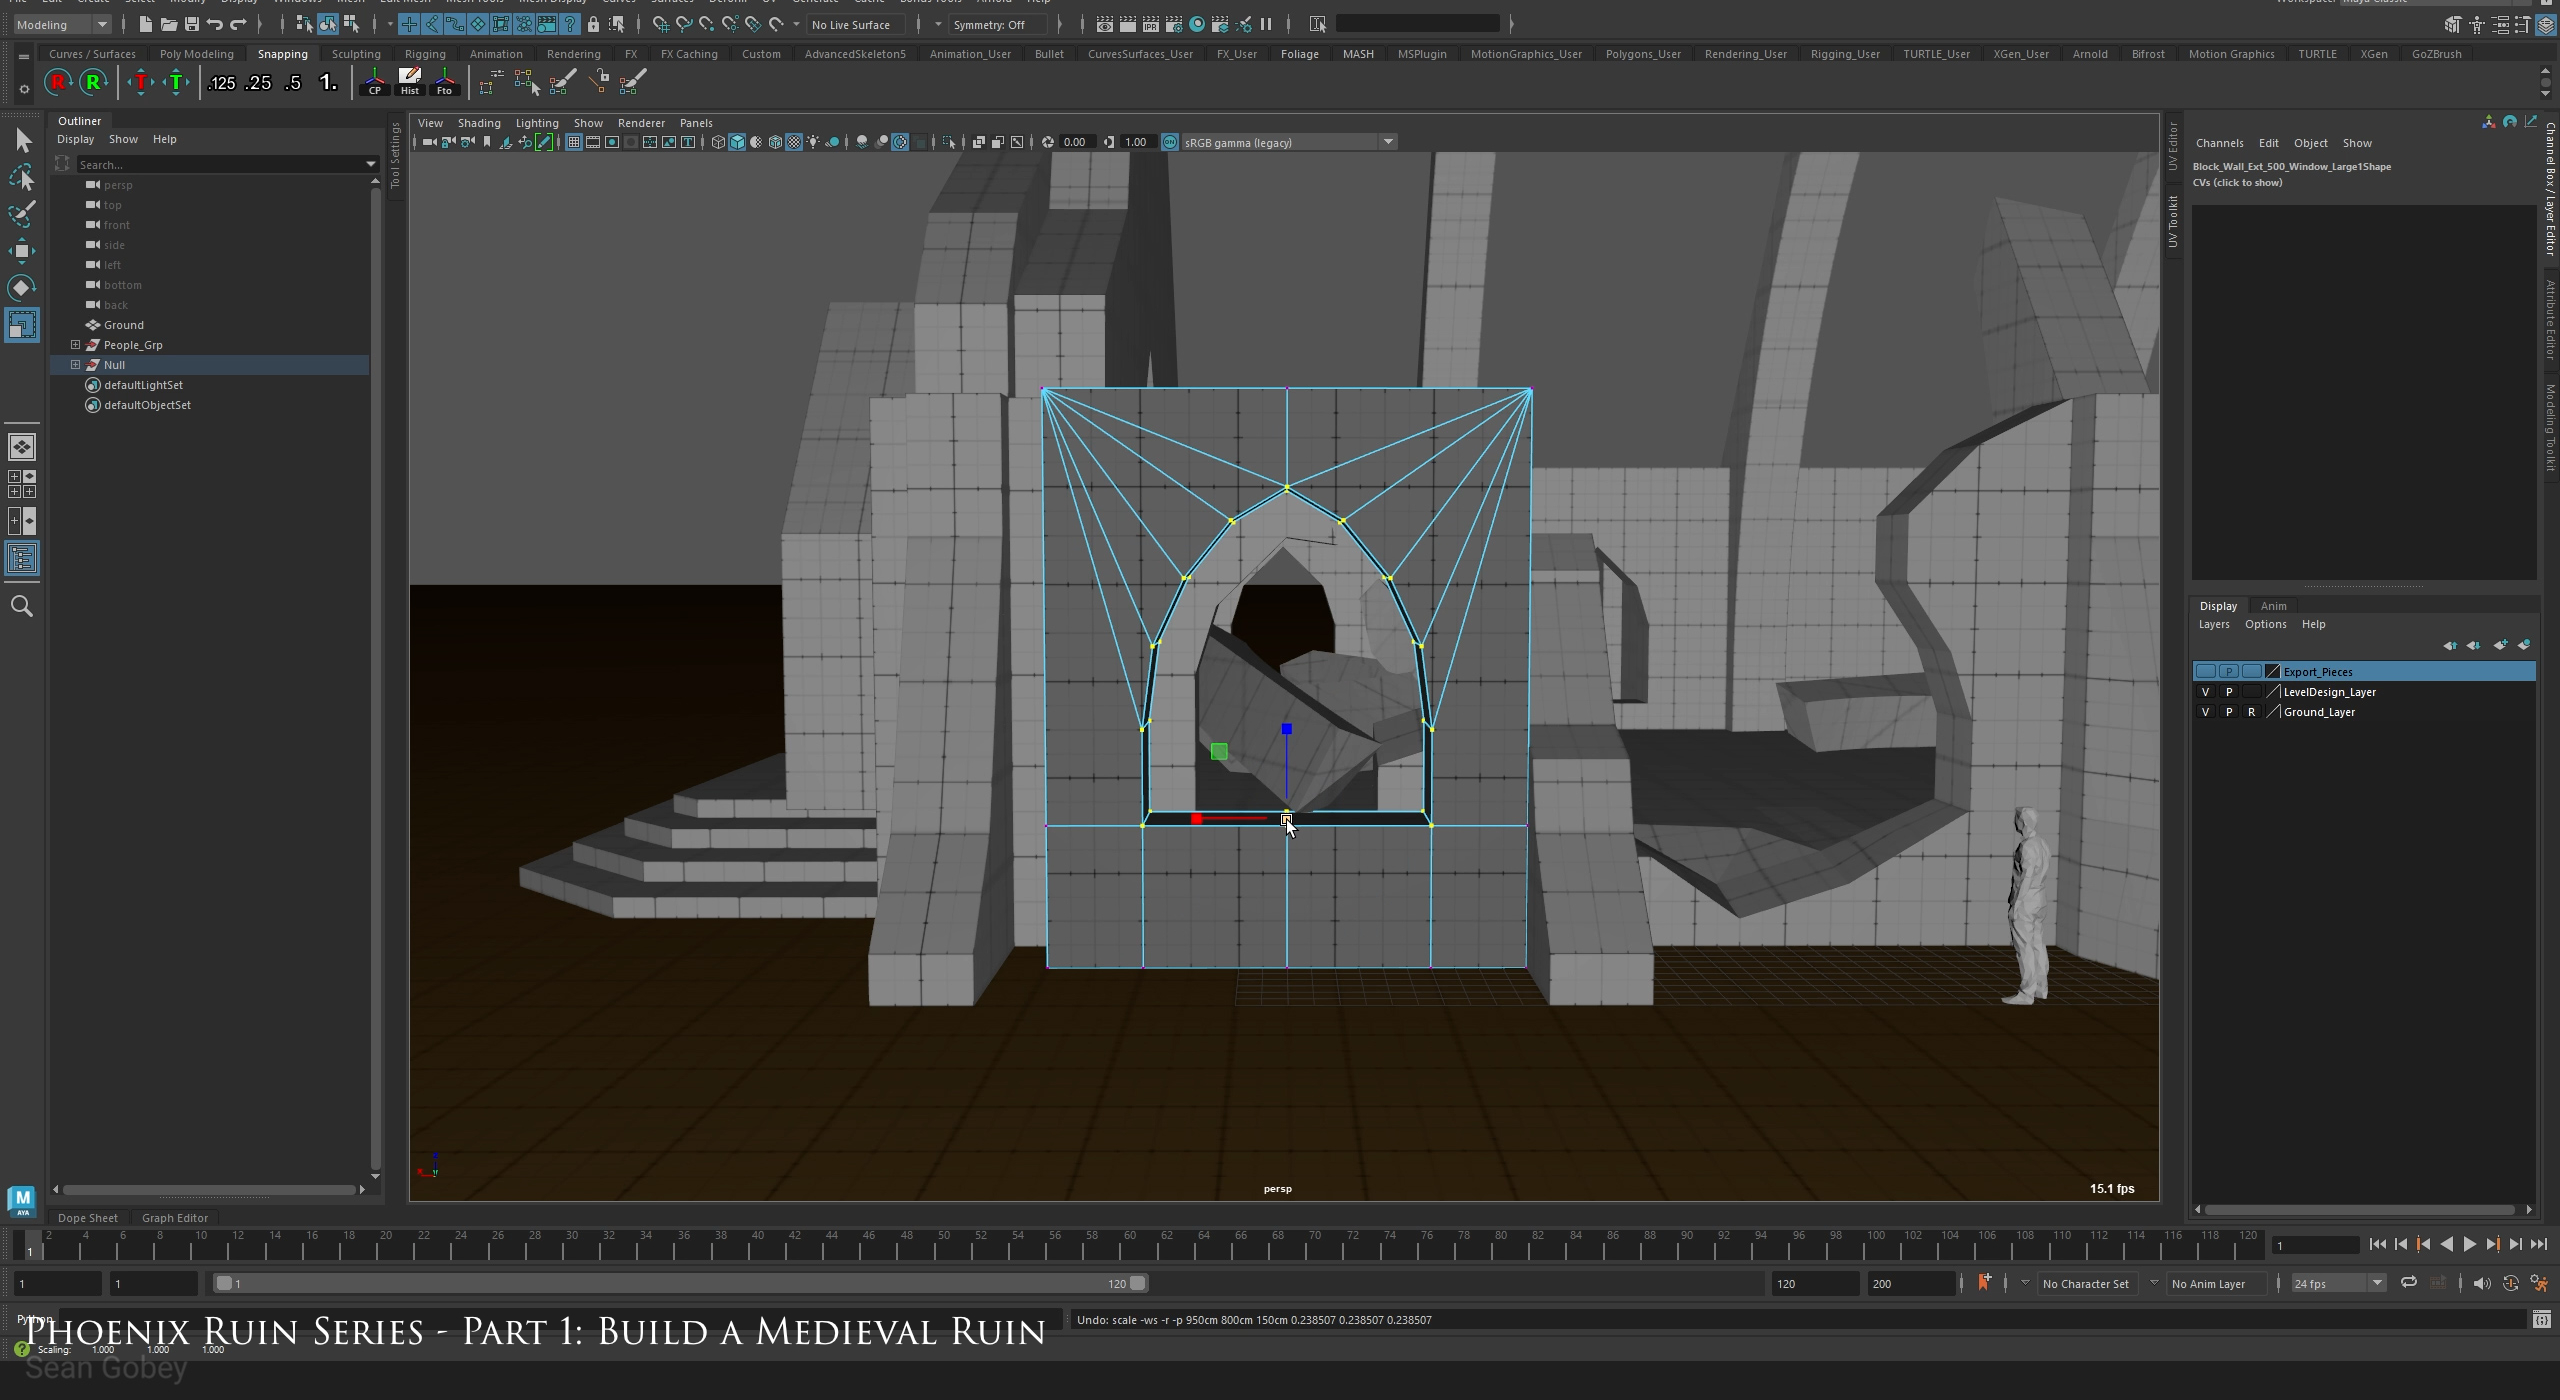
In chapter 2 we dismantle the provided level design geometry and build rough representations of our asset kit as well as identify what assets need to be built.
Note: if you’re not comfortable with or don’t have access to Maya feel
free to use your own modelling package as most techniques used are
universal.

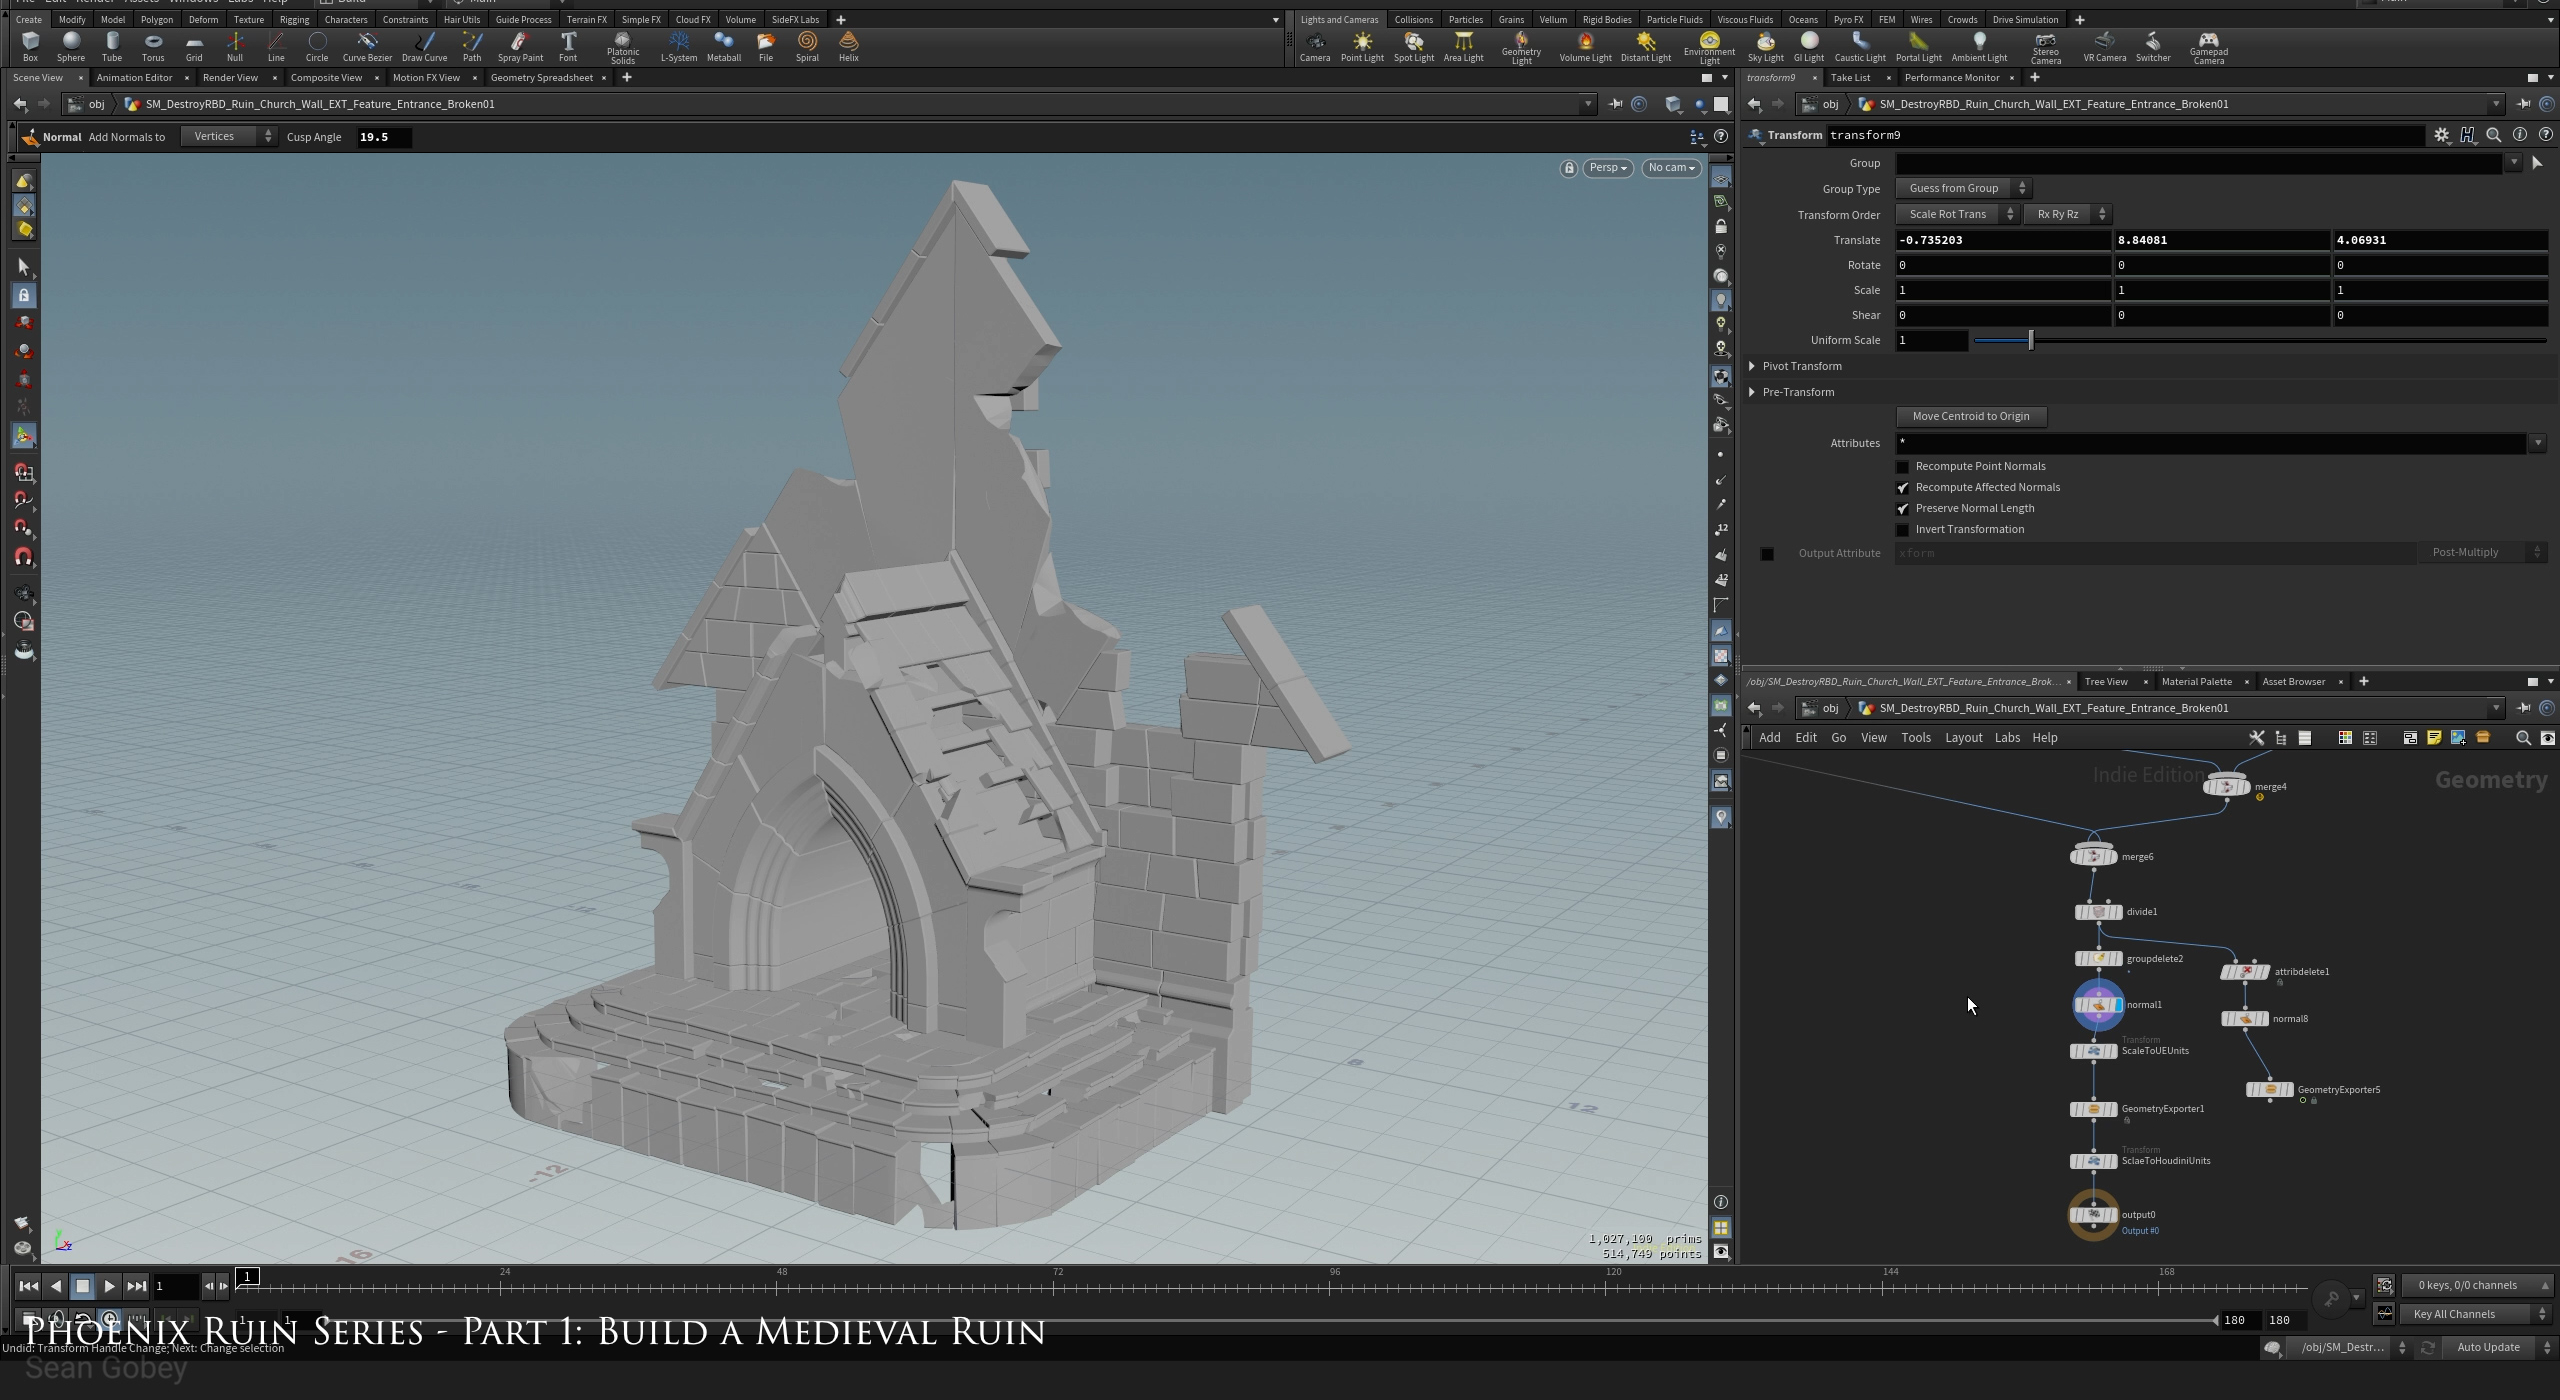
In chapter 3 we dive into Houdini and start building our assets. Since we’re building tiling geometry we create tools to speed up this process whilst giving us maximum freedom to be creative AND consistent. These tools include a Wall Builder, Brick Cutter, Brick Offset, and Geometry Exporter.
In chapter 4 we take the time to art direct destruction by carving out holes and breaking asset pieces to represent the final kit geometry.
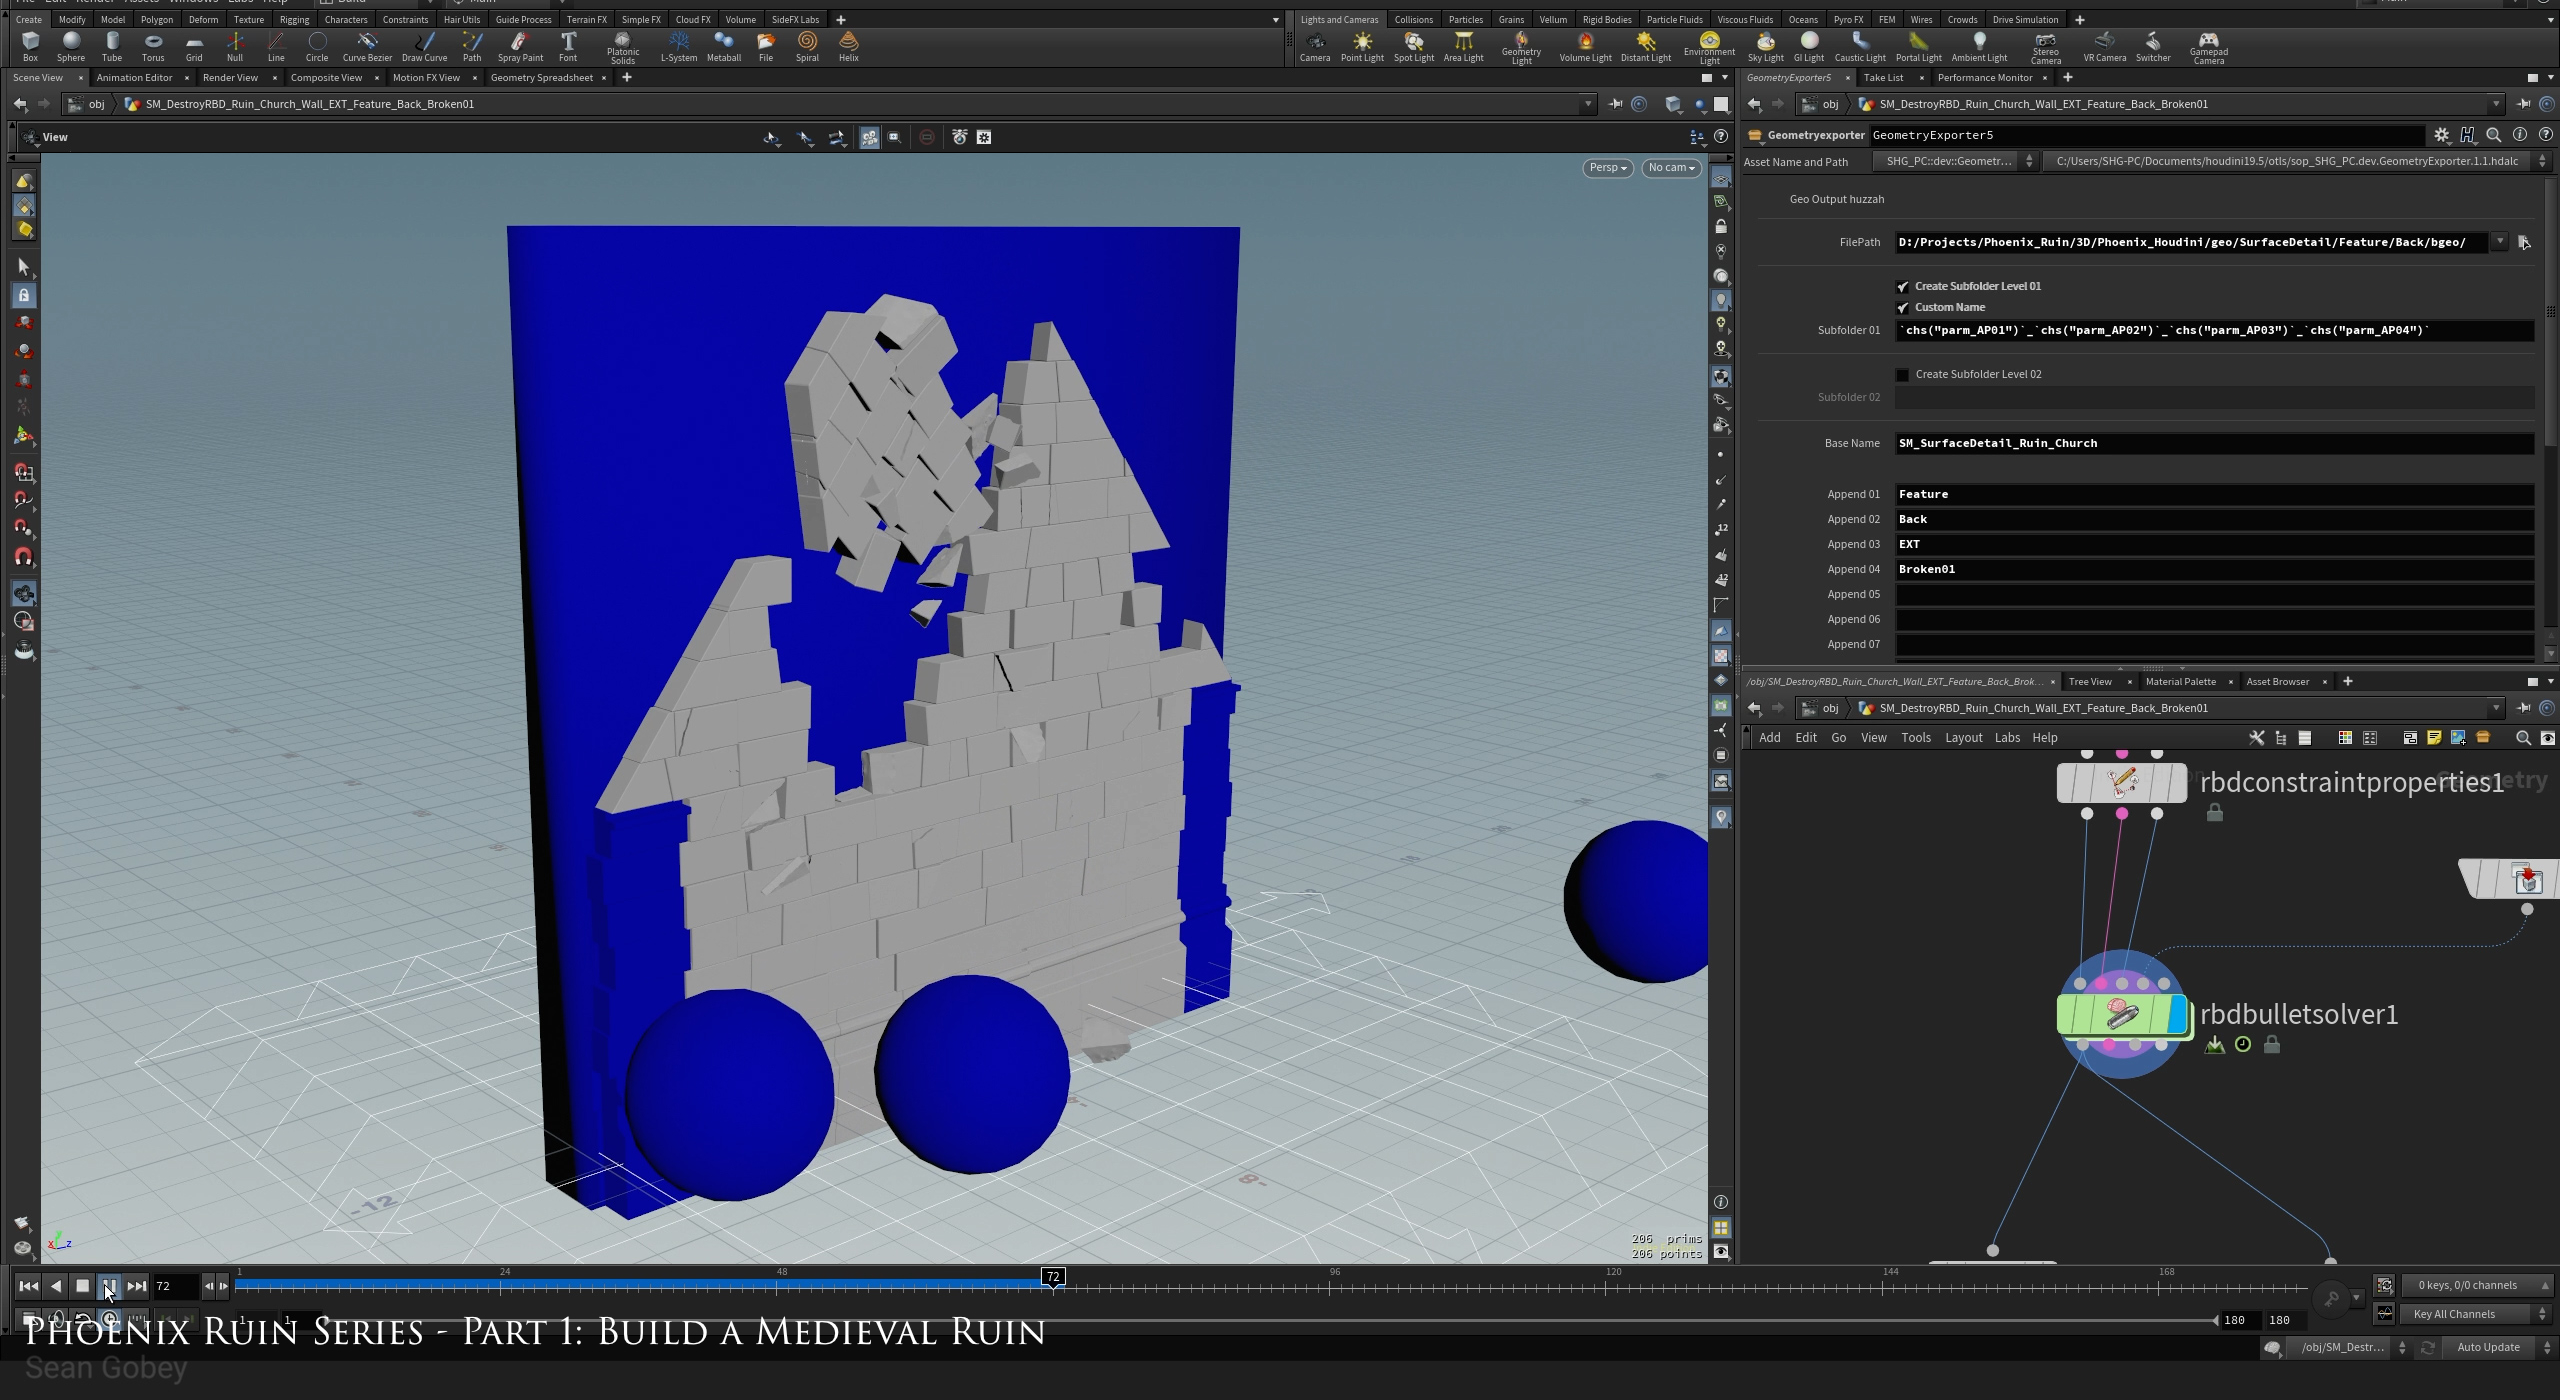
Once we’re happy with the macro shapes, in chapter 5 we use Houdini’s Rigid Body Dynamics (RBD) to smash objects into our assets, giving them an organic and worn feel.
In chapter 6 our kit geometry takes on it’s final look. We create tools to procedurally add surface and edge damage to our assets and further explore vertex colours and how to use them in our texturing pipeline. We also build a procedural UVing tool!
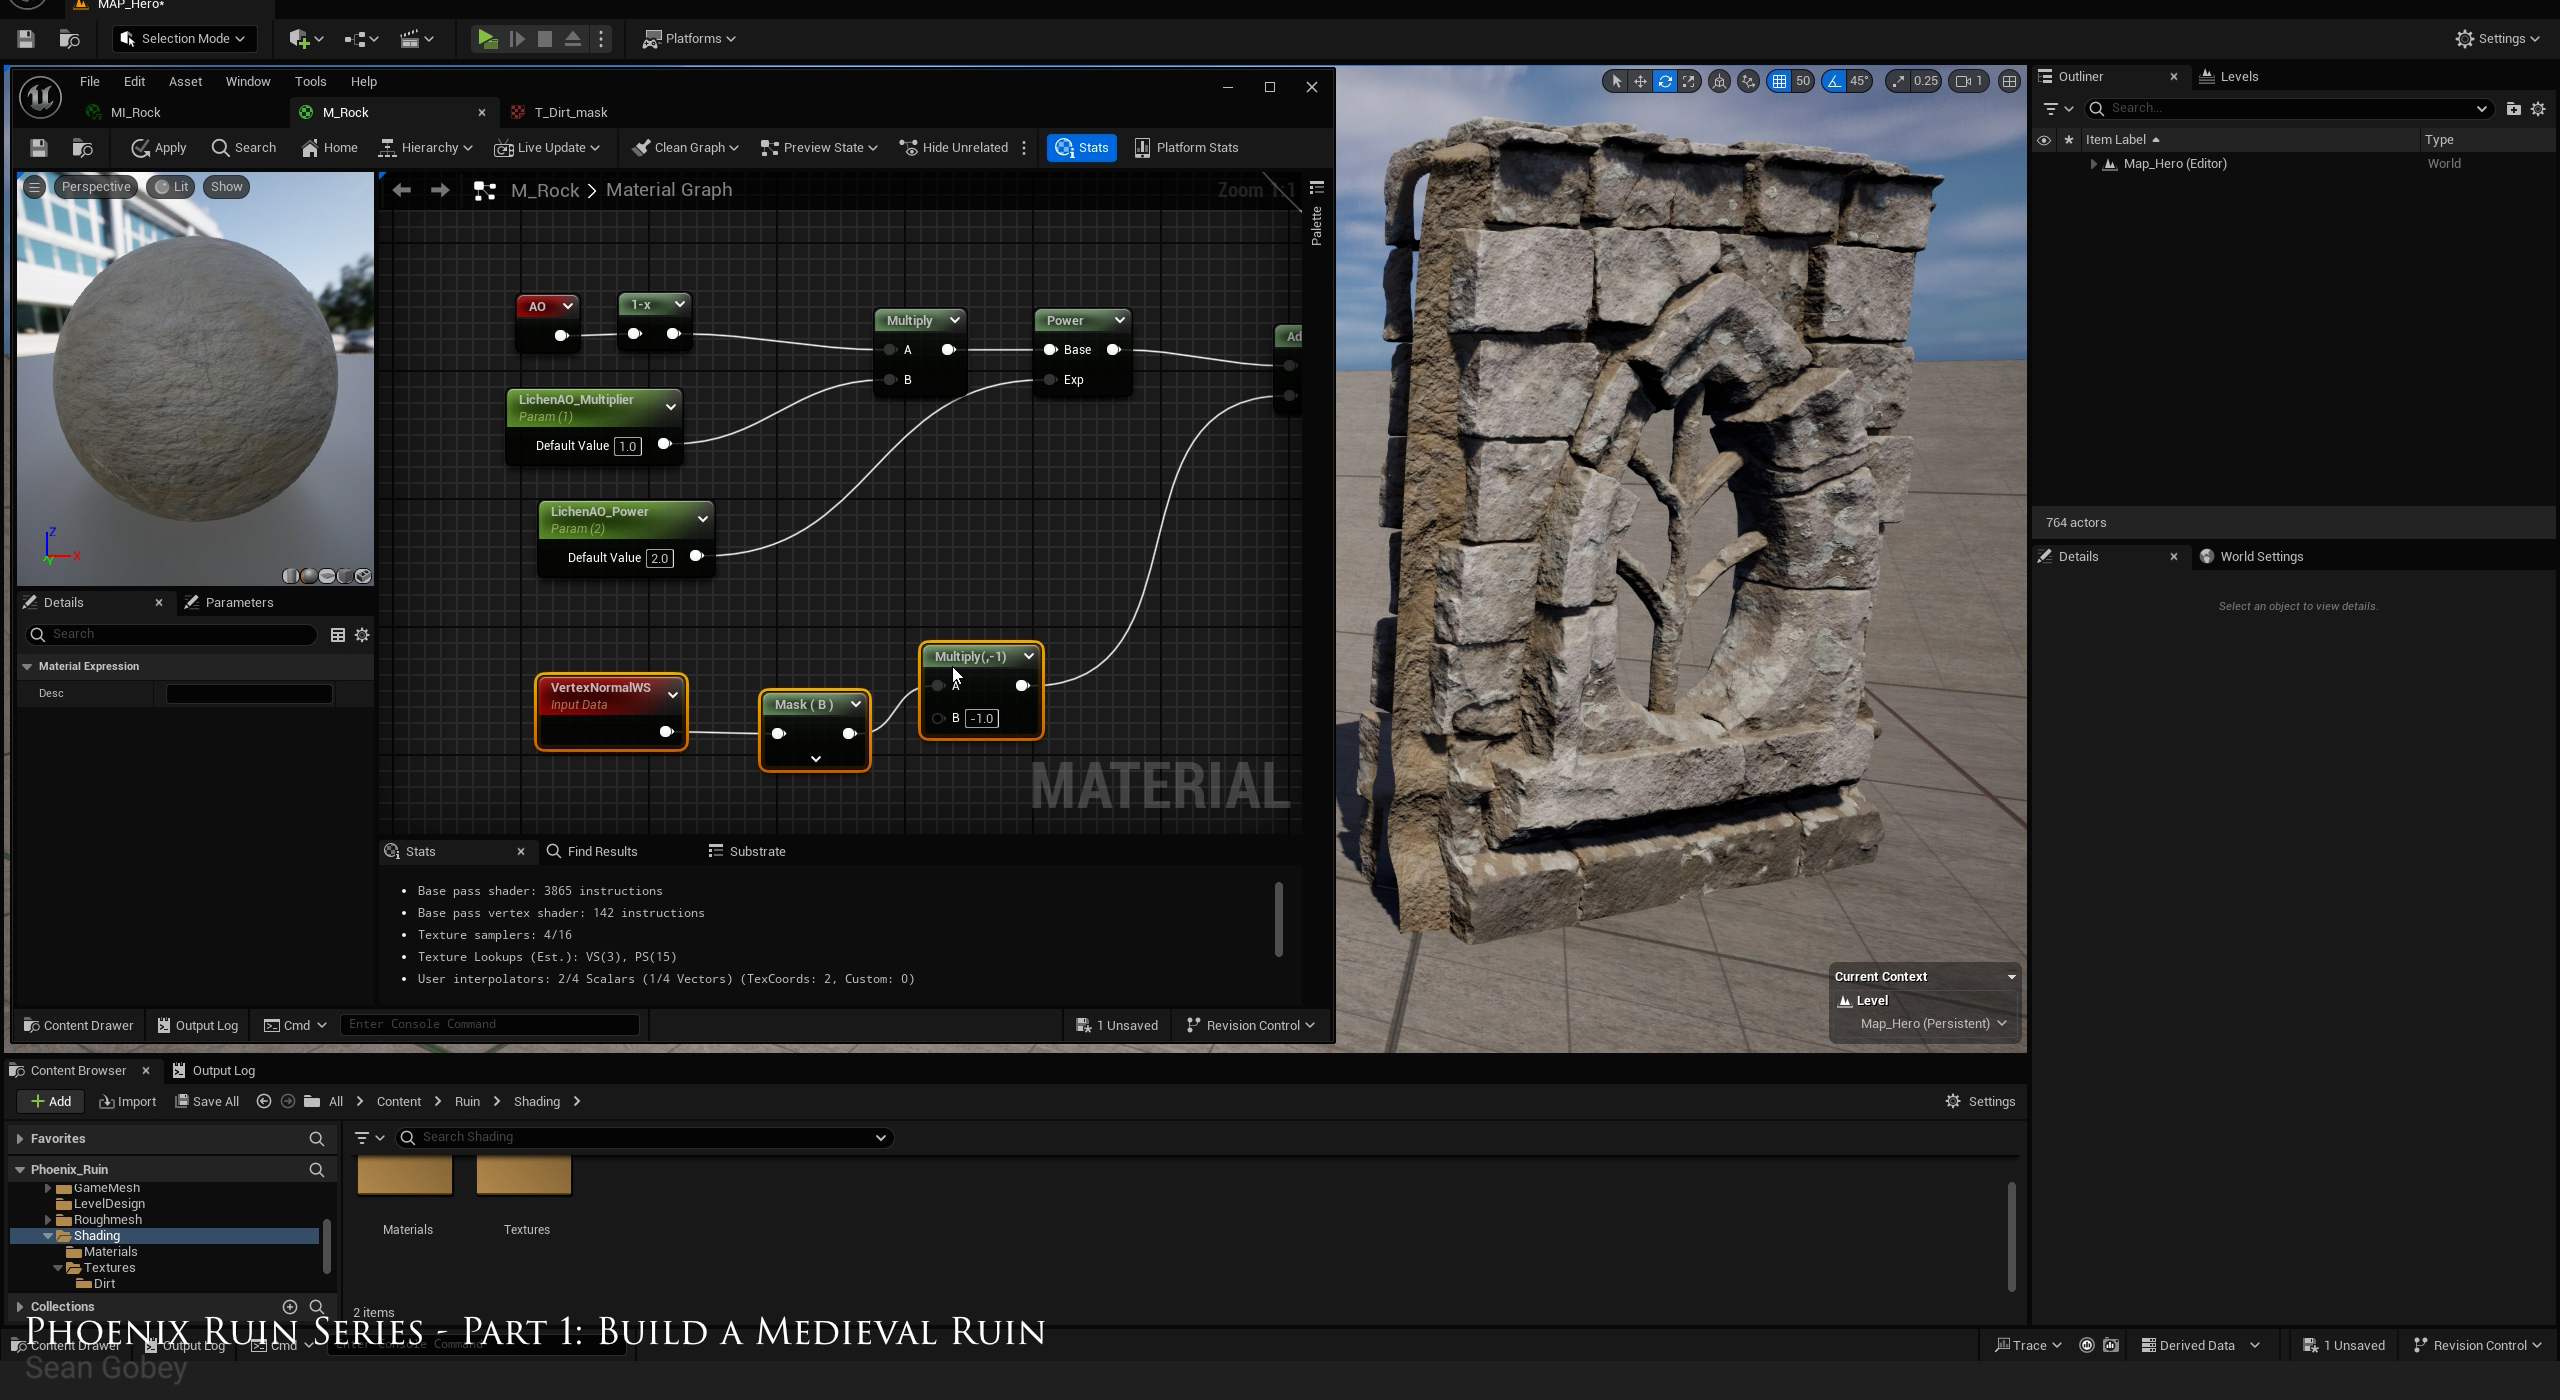
In chapter 7 we use Substance Designer to create rock, dirt, and lichen texture sets. We discuss texel density and how taking the time to standardize it can reduce material complexity before building our materials in Unreal Engine 5.
And finally in Chapter 8 we finish up and bring the whole project together by creating our handrail, rock, and ruin chunk prop assets.

CREATED BY

COMMENTS
Homedale64 2 weeks, 2 days ago |
Very happy with this course.
Easy to follow along with a ton of information - well paced.
Stellenem 2 weeks, 2 days ago |
This course has been so helpful, I keep going back to it.
Enzo86 2 weeks, 1 day ago |
Excellent! Where has this been all my life! Thank you
TQ 2 weeks ago |
This meticulously crafted course is structured into easily digestible chapters, each tailored to nurture your personal and professional growth as an artist, coupled with advancing in your craft.
Please log in to leave a comment.